Flexible Natural Stone™ Installation Guide

Simple, Professional Installation for Every Project

1. Preparing the Surface
Start with a surface that is clean, dry, level, and structurally stable. Proper preparation ensures strong adhesion and long-lasting results.

2. Applying Adhesive
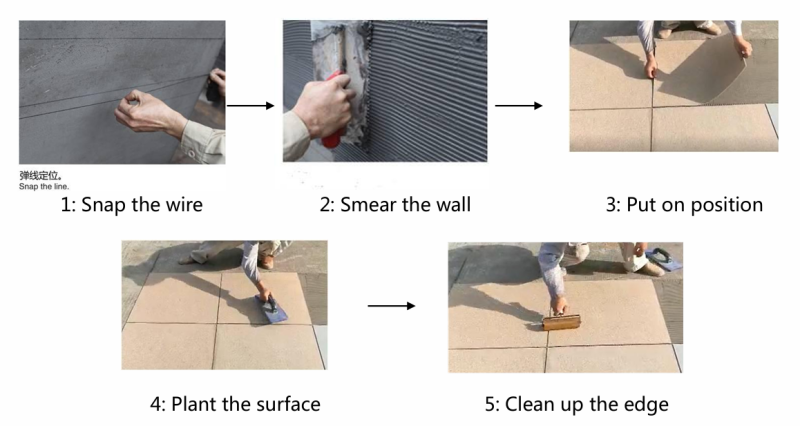
Use a high-quality polyurethane or high-temperature construction adhesive. Spread it evenly across the surface with a notched trowel to guarantee uniform coverage and a secure bond.

3. Cutting and Shaping
Cut panels to the desired size using tools like a track saw, circular saw, or an angle grinder equipped with a diamond blade. Panels can easily be shaped to fit curved walls, columns, or intricate architectural designs.

4. Adding the Finishing Touches
No sealing is needed. For a refined, professional finish, use aluminum trims or color-matched silicone to complete exposed edges.


MORE INFORMATION

Surface Preparation

  • Clean the substrate: Ensure the surface is free from dust, grease, and debris.
  • Dry & stable: The surface should be dry and structurally sound.

  • Suitable substrates: Drywall, MDF, OSB, plywood, cement board, sealed concrete, metal, fiberglass, and select plastics.

  • Priming: For certain surfaces, apply a primer to enhance adhesion.

Panel Preparation

  • Acclimatization: Store panels flat in the installation area for 24–48 hours at temperatures between 15–30°C (59–86°F).
  • Dry-fit layout: Arrange panels to plan seams, corners, and patterns.

  • Cutting: Use a utility knife or tin snips to trim panels from the backing side. For intricate cuts, a jigsaw or oscillating tool is recommended.


Adhesive Application

  • Choose the right adhesive: Use a high-tack adhesive suitable for both the panel and substrate.

  • Application: Apply adhesive to the substrate using a notched trowel, ensuring even coverage.

  • Panel placement: Press the panel firmly onto the adhesive, starting from one edge and working across.

  • Rolling: Use a hand roller or squeegee to eliminate air pockets and ensure full contact.

Seams & Corners

  • Seam alignment: Butt joints with minimal gaps, aligning natural stone patterns.
  • Corners:

    • Option A: Folded edge technique (requires heating the backing; professional application).

    • Option B: Use aluminum trims matching the panel color.


Finishing Touches

  • Edge detailing: Terminate edges with trims or return the panel around corners.
  • Sealing: While not mandatory for indoor applications, sealing is recommended for:

    • Wet areas: Bathrooms, kitchens, spas.

    • High-traffic zones: Commercial spaces, hallways.

  • Cleaning: Wipe with a damp cloth and pH-neutral cleaner. Avoid abrasive materials.


Maintenance & Care

  • Regular cleaning: Dust with a soft cloth or vacuum brush.

  • Stain removal: Use mild soap and water; avoid harsh chemicals.

  • Inspection: Periodically check for any lifting or damage, addressing promptly.

Safety & Precautions

  • Protective Gear: Always rock gloves, safety goggles, and a dust mask when cutting panels. FNS™ dust is minimal, but safety is non-negotiable.

  • Ventilation: Keep airflow on point when using adhesives or sealants—open windows or use fans to clear fumes fast.

  • Fire Ratings: FNS™ panels are ASTM E84 tested for surface flame spread and smoke development. Always check local building codes and fire safety regs before sign-off.


Additional Resources

Are You a Visual Learner?

Watch our step-by-step installation video below:

Which adhesive is best for Angkop FNS™ x Eco-Flexi MCM panels?

Click below to explore and purchase the recommended adhesive using the provided Amazon link.

Shop Angkop FNS™ x Eco-Flexi MCM Panel Adhesive